2 minute read time · Updated August 8, 2024 · First published August 8, 2024
We often make improvements to the already extensive invoicing capabilities of our room booking software. This is to accommodate a diverse range of invoicing scenarios and usage cases that our customers tell us about.
For MIDAS v4.37, we’ve made a couple of improvements based on customer feedback.
Manual quotation payments for tentative bookings can now update the booking’s type
“Tentative” bookings were first introduced in MIDAS v4.14 in 2016. Bookings of this type are automatically removed from the system if they’ve not ‘confirmed’ within a specified time frame or by a certain date/time.
In 2023, we also introduced a “quotation” feature. Used in conjunction with tentative bookings, you could generate quotations for clients when making tentative bookings for them.
If the client accepts and pays their quotation online, their ‘tentative’ bookings automatically convert to regular ‘confirmed’ bookings.
Of course, there may be instances when a client wishes to accept a quotation but pays ‘offline’ – perhaps over the phone or in person.
MIDAS can deal with ‘offline’ payments by allowing administrators to manually update quotations or invoices to reflect that a payment has been made against them.
Starting with MIDAS v4.37, if ‘manual’ payment is made for a quotation for a tentative booking, this can now update the associated bookings and make them ‘confirmed’.
Previously, this functionality was only available when an ‘online’ payment was made for a quotation.
Updating an invoice’s internal notes is now recorded in the Recent Activity Log
We appreciate that keeping an accurate audit trail is essential. The ‘Recent Activity Log’ in our software logs all user actions with date and time stamps. This useful log (which can also be downloaded) allows administrators to monitor how their booking system is being used.
Whenever an invoice’s status is updated, these actions are recorded to the audit log.
Each invoice can also have ‘internal notes‘ added to them. These notes are not visible to the recipient of the invoice, but are visible to administrators when viewing an invoice.
Until now, the action of updating internal notes for an invoice was not recorded to the ‘Recent Activity Log’ itself.
We’ve addressed this for v4.37. Whenever an administrator makes or updates the internal notes for an invoice, quotation, or credit note, this activity is noted in the recent activity log.
3 minute read time · Updated August 5, 2024 · First published August 5, 2024
One of the helpful features of MIDAS is the ability to allow visitors to your website to check availability of your facilities and submit booking “requests” online. They can do this without logging in or requiring an account.
Once a booking request is submitted, the manager(s) of the request facility are notified. A manager can then then quickly approve or reject the booking request in MIDAS with just a few clicks.
Bulk processing of all booking requests was first introduced in MIDAS v4.14
This saved time in instances where there were numerous booking requests which all required approval or rejection.
To be able to bulk approve a number of booking requests, a setting was made available. This instructed MIDAS as to the order in which it should approve requests when approving them in bulk.
The “Bulk Approval Order” setting has the following options:
Earliest Requested First – Booking requests will be approved in the order in which they were received. The earliest request received will be approved first.
Latest Requested First – Booking requests will be approved in the reverse order in which they were received. The most recently received request will be approved first.
Earliest Commencing First – Booking requests will be approved in the order in which the requested booking would start. Requests for the soonest start times will be approved first.
Latest Commencing First – Booking requests will be approved in the reverse order in which the requested booking would start. Requests for the furthest away start times will be approved first.
For MIDAS v4.37 we’re giving managers even greater control when it comes to processing multiple booking requests.
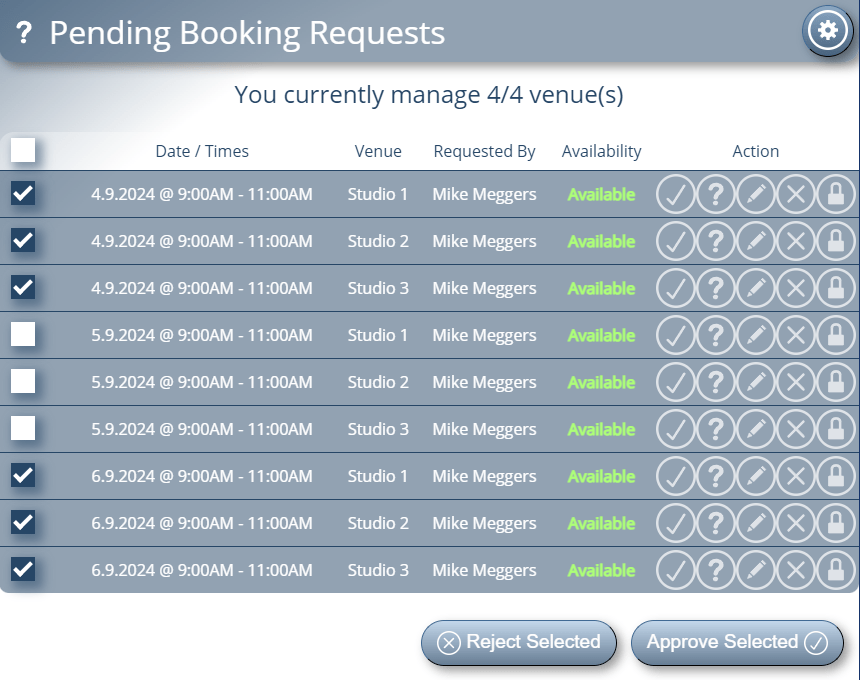
In addition to be able to approve or reject one booking request at a time, or “bulk” approve/reject ALL requests at the same time, you can now also selectively approve/reject multiple requests.
On the Pending Booking Requests screen there’s now a checkbox alongside each request that’s awaiting processing.
Selectively process multiple booking requests in MIDAS v4.37+
A manager can use these tick boxes to select multiple requests and then click the “Approve Selected” or “Reject Selected” buttons at the bottom of the screen to process the selected requests accordingly.
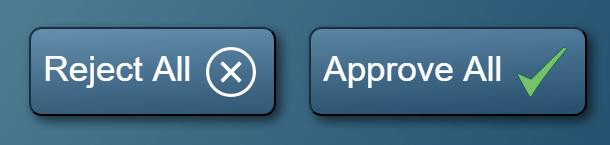
If no requests are selected, the “Approve Selected” and “Reject Selected” buttons change. They then become the familiar “Approve All” and “Reject All” options which if used process all requests in the queue.
3 minute read time · Updated July 31, 2024 · First published July 31, 2024
MIDAS includes a number of useful booking and client fields out-of-the-box. You can use these to capture information about your clients and their bookings. In addition, the software also allows you to create custom fields to record additional information with each booking or client.
For MIDAS v4.37, we’re making improvements to a couple of the ‘custom’ fields you can add to your scheduling system.
Custom “Text Area” fields can have a height set and can be resizable
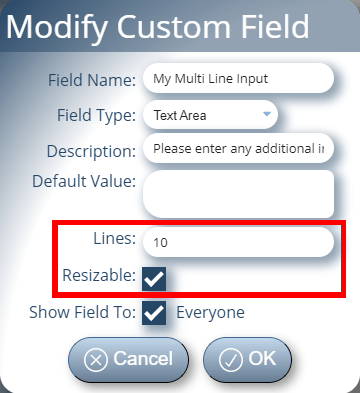
Set the number of visible lines and make textareas resizable
Sometimes a single-line input field may not be sufficient to capture the amount of information you desire. In such instances, MIDAS allows you to alternatively create a multi-line “Text Area” input field.
Until now, creating a custom Text Area field would display a text input field with a relatively small height. Whilst its contents would be scrollable, the field would typically only show 2-3 lines of text at a time.
Now when creating (or editing) a custom Text Area field, you’ll have more control! You’ll be able to specify the number of rows that should be displayed at any given time on the field.
So if you anticipate that your custom field is only going to hold a couple of lines of text, you can set the number of rows to display low. But, if you expect your custom field to capture dozens of lines of text, you can increase the number of rows shown.
Furthermore, you can also set a custom Text Area field to be “Resizable”. When a Text Area field is set as resizable, a user will be able to drag the bottom of the custom Text Area field down to allow the display of more lines of text at once.
Custom file uploads can be set to either view or save/download the file when clicked
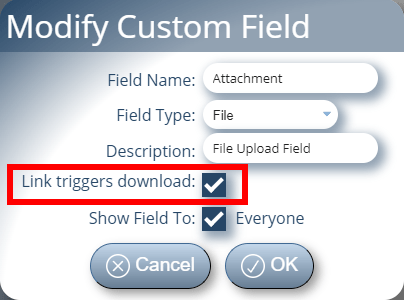
Choose whether file attachments should be downloaded or viewed inline
When we implemented this custom field type in 2014, we configured MIDAS to ‘hint’ to an end-users user’s browser that an uploaded and attached file should be ‘downloaded’ to the user’s device when clicked.
In those days, it wasn’t common place for web browsers to be able to open a variety of file types. There was even a time when browsers would struggle to open and correctly display PDF files.
These days, web browsers can open and display a wide range of document/file types.
For v4.37, we’ve provided administrators with the option to allow MIDAS to ‘hint’ to user’s browsers whether an custom file upload should be either ‘downloaded’ to the user’s device when clicked, or ‘opened/displayed’ in a new window/tab instead.
So if you’re attaching PDF files to bookings, for instance, you can now instruct browsers to display these files in your browser instead of prompting you to download them to your device.
Please note that MIDAS only provides ‘hints’ to user’s browsers as to whether to view or download an attached file. It’s down to individual browsers as to whether they respect these hints and how they process the attached files.
5 minute read time · Updated September 3, 2024 · First published July 25, 2024
In MIDAS v4.37, we’re deprecating some outdated privacy and security settings.
In this post, we’ll outline what’s changing and explain the reasons behind the decision to remove these options.
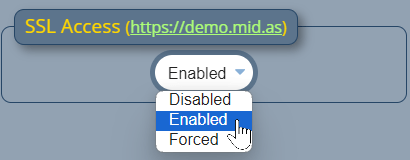
“SSL Access” setting has been removed
SSL Access setting in MIDAS
In the early days of the World Wide Web, you connected to websites over “http”.
“http” connections were not secure and could be intercepted. So along came “https”, which allowed visitors to connect to websites over encrypted Secure Socket Layer – or SSL – connections.
However, adoption of “https” was initially slow by the majority of the World Wide Web. Primarily, this was due to SSL certificates being very expensive. Large financial institutions were naturally quick to jump on https. However, the price of SSL certificates put securing websites with https out of reach of the average webmaster. Especially when the cost to renew them every 1-2 years was factored in.
Now, as you may know, we’ve been developing our web based MIDAS room booking software for nearly 20 years now! When we first began to offer a “cloud hosted” booking system to customers (way back in 2007), SSL/https use around the web was not wide spread, and was expensive to implement.
Initially in 2007, we offered our cloud-hosted customers the option of being able to access their hosted MIDAS system over secure https. This was available via an optional (paid) addon for their scheduling system.
As part of this, we added a new “SSL Access” setting to v3.13. This allowed administrators to control whether insecure http and/or secure https connections would be permitted to their MIDAS system.
In August 2012, we then took the further decision to include an SSL Certificate to enable secure connections for all our existing and future cloud hosted customers. At the same time, we enforced https connections to all hosted MIDAS system.
Consequently, the “SSL Access” option first introduced in MIDAS v3.13 became redundant for our cloud-hosted customers. Since 2015 and MIDAS v4.09, this option has no longer been available in cloud-hosted editions of our booking system.
In the following years, gradually the cost of SSL certificates reduced. Then in 2016, along came a game-changing service called “Let’s Encrypt“. Let’s Encrypt offered FREE SSL certificates for all. This finally allowed every webmaster the ability to “secure” visitor connections to their websites at zero cost.
Now, in 2024, SSL/https certificates are the norm – in fact, all modern web browsers now alert you if you attempt to visit an insecure website via http.
So whilst we removed the “SSL Access” settings in cloud-hosted MIDAS systems back in 2015, we’re now also removing these settings for self-hosted customers starting with MIDAS v4.37.
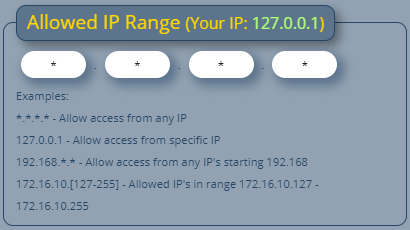
“Allowed IP Range” setting has been removed (self hosted editions only)
Allowed IP Range setting in MIDAS
The “Allowed IP Range” setting is one of the earliest security settings we provided in our room booking system. In fact, it was first introduced in v1.35 back in August 2007.
The setting allows an administrator to restrict access to their MIDAS system to an IP address or range.
This can be useful if a MIDAS system is hosted on a public-facing web server, which potentially could be accessed by anyone worldwide. The “Allowed IP Range” setting can be used to restrict access to users in your own country, organization, or to just you!
However, one of the limitations of this setting is that it only supports ipv4 address, and not ipv6 addresses.
Also, in the years since this setting was first introduced, other security and firewall products are available which provide greater control over access to websites, apps, and servers.
Therefore, starting with MIDAS v4.37, we have removed the “Allowed IP Range” setting in self-hosted editions.
If you’re a self-hosted customer and wish to restrict access to your MIDAS system by IP address you should consider other options to achieve this.
For instance, on Apache servers, you can easily allow/deny access by ip address/range in your httpd.conf or .htaccess files. For more information, please see Apache’s guidance on access control.
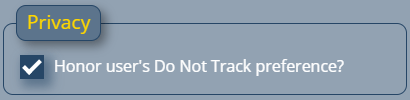
“Do Not Track (dnt)” has been superseded by “Global Privacy Control”
Honor user’s Do Not Track preference setting in MIDAS
“Do Not Track” – or ‘dnt’ for short – was an official HTTP header first proposed in 2009. It was intended to allow user to opt-out of tracking by websites.
By 2011, all major web browsers had implemented support for the proposed “Do Not Track” features.
In 2017, with the release of MIDAS v4.16, we included an “Honor user’s Do Not Track preference” setting.
If enabled (and if an end-user had also enabled the “Do Not Track” feature in their browser), MIDAS would not log the user’s IP address in the Recent Activity Log.
However, globally, recognition and support of the “Do Not Track” HTTP header by websites was poor. So much so that in January 2019, the “Do No Track” HTTP header was officially deprecated. A month later, Apple removed DNT support from their Safari browser.
Whilst some other browsers still continue to offer a “Do Not Track” setting, it has since been supersede by a new “Global Privacy Control” – or GPC – header.
At time of writing, Global Privacy Control is still classed as an “experimental” and “non standard” technology, and it’s behaviour may change in the future.
But for MIDAS v4.37, we’ll support both DNT and GPC features. The “Honor user’s Do Not Track preference” setting will be renamed to “Honor user’s privacy preferences” to reflect this.
It’s likely that in a future update we’ll fully drop support the deprecated “DNT” header. At time of writing though, as some browsers still support it, we’ll continue to support it too.