Ever since the first version of our MIDAS room booking software, users choose spaces they wish to book from a “list” of available rooms.
Starting with MIDAS v4.31, we’re excited to now offer an alternative – the ability to book spaces by simply selecting them on a graphical floor plan, map, or schematic of your facilities.
How to set up floor plans and maps in MIDAS
Administrators can choose whether MIDAS shows a “list” of venues to users, or allows the selecting of venues from a visual floor plan or map. This is done though a setting which may be accessed via MIDAS Admin Options → Manage MIDAS → Bookings → Floorplans / Maps.
Assign venues to groups
To be able to use floor plans or maps in MIDAS, you’ll first need to assign your venues (rooms / bookable spaces) to venue groups. Each venue group can have a floor plan or map associated with it.
For example, if your building has two floors, you could have a dedicated floor plan / map for each floor. In order to do this, you’ll need to assign all your first floor rooms to one venue group, and all your second floor rooms to another venue group.
Here’s a quick tutorial on how to assign venues to groups:
Upload a floor plan / map
Once you’ve “grouped” your bookable spaces, you can then upload an image of a floor plan, map, or schematic in which those bookable spaces appear.
You can do this via MIDAS Admin Options → Manage Venues → Groups.
Select the venue group you wish to upload an image for. Next, click the “Map” button to open the Map Editor.
In the Map Editor, click the “Upload New Map” button to select an image from your device to upload.
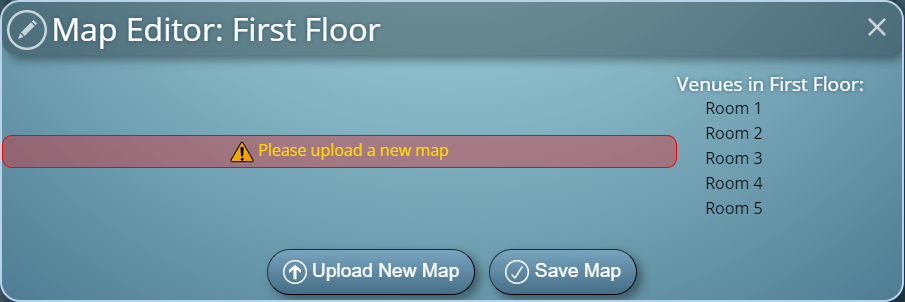
Your upload should be a PNG image file with dimensions of at least 200 x 200 pixels.
Define areas on your floor plan / map
Once you’ve uploaded your map, you’ll then need to tell MIDAS the position of each of your bookable spaces on that image.
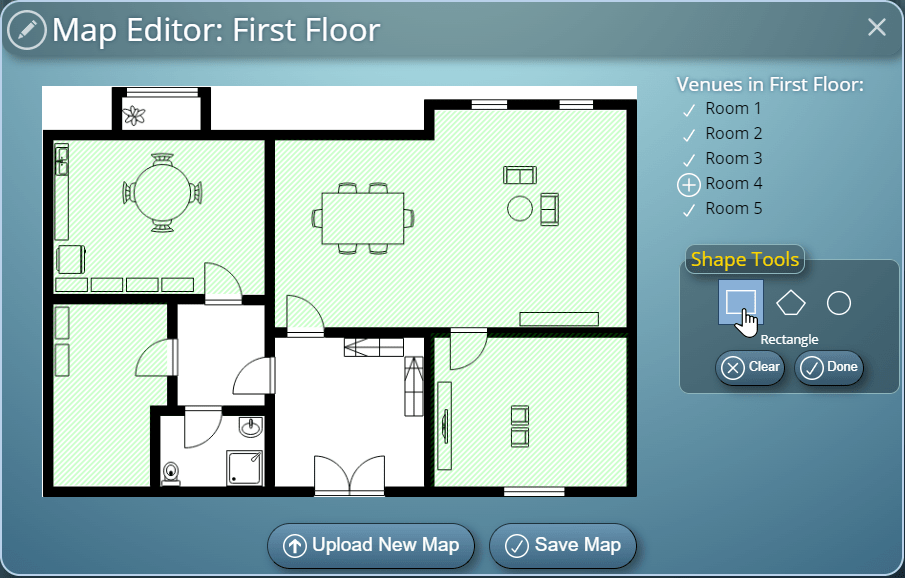
To do that, select the “+” icon alongside one of the bookable spaces in the group from the right side of the Map Editor.
The “Shape Tool” selector will then open. This allows you to select whether you wish to define a rectangle, polygon, or circle area on your floor plan / map for the space you’ve selected.
Accommodating Rooms of all Shapes and Sizes
For square or rectangular rooms, select “Rectangle“, then:
- Click on one corner of the room on your floor plan / map (i.e. the upper left corner of the room)
- Click on the opposite corner of the room on your floor plan / map. (i.e. the lower right corner of the room)
For irregular shaped rooms, select “Polygon“, then:
- Click on each point in room on your floor plan / map where the perimeter walls change direction.
- Once you’ve done this around the room’s entire perimeter, click “Done”.
For circular rooms, select “Circle“, then:
- Click on the center of the room on your floor plan / map.
- Click on a point on the perimeter of the room on your floor plan / map.
Once you’ve defined an area on your floor plan / map, a “tick” icon will be shown next to the name of the bookable space in the venue list.
If you make a mistake, you can easily clear an area by tapping the tick icon next to the name of the venue. The icon will change to a cross, and tapping this will remove that area from the map. You’ll then be able to recreate a new area.
Once you’ve defined areas on your map for each of your venues, click “Save Map” to save changes.
What end-users see
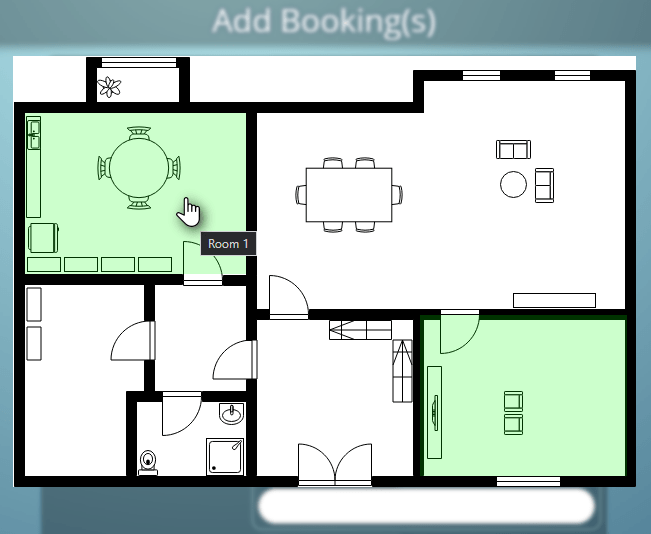
When a user clicks the “Add Bookings” icon in their MIDAS toolbar, they’ll see the floor plans / maps you’ve created for each of the venue groups the user has been granted permission to access. These are shown instead of the usual “list” of venues to choose from.
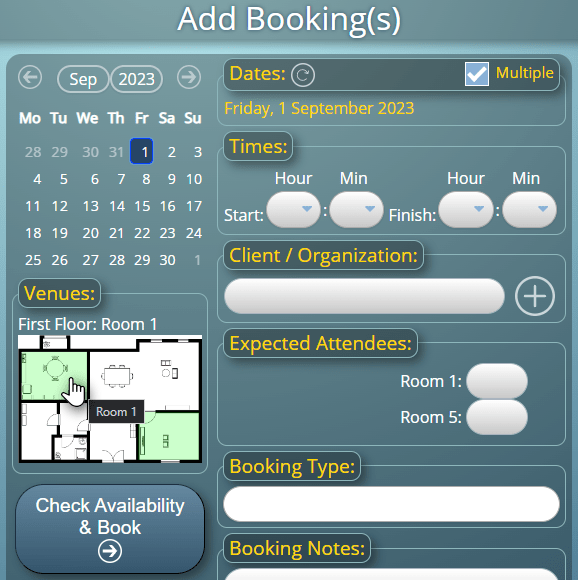
Selecting a venue is then as simple as clicking on it on the floor plan. Each selected space will be highlighted in green on the floor plan. Multiple spaces may also be selected concurrently on each floor plan.
A larger floor plan may also be opened by clicking on the name of the venue group. This bigger floor plan makes it easier to select rooms on larger layouts:
The remainder of the booking process is exactly the same as before. The user enters the required information about their booking. Next, MIDAS checks that the dates, times, and venues they want are available and if so, the user places their booking.
Video Tutorial
Applications
The new floor plan / map feature a great way for users to see the location of the rooms they’re booking. It also have has other applications as well…
Take for example a computer room, where students can book an individual workstation.
Before the floor plan / map feature, each workstation in MIDAS may have been listed with a number. For example “Workstation 1”, “Workstation 2”, “Workstation 3”, etc.
This provided no real indication to students as to the particular location of their selected workstation within the computer room.
By uploading a defining a floor plan of your computer room, students will be able to select their desired workstation by simply clicking upon its location on the floor plan.