MIDAS now allows administrators to control whether users can change their display name, email address, or password – providing greater security and flexibility for shared and individual accounts.
Previously, users couldn’t change their display name or email themselves – only an administrator could do this. An administrator could also grant or deny the ability for each user to be able to change their account password.
“Why would you ever not want to allow a user to change their password?” you’re probably thinking!
Many organizations like to create a very limited and generic ‘view only’ account in their MIDAS system. One account that a number of staff all share.
Obviously, you wouldn’t want one person to change the account password on such a ‘shared’ account and lock every one else out. So on this account an administrator could revoke the “Can Change Password” permission to strengthen account security.
For MIDAS v4.41 we’ve added a couple of new and related permissions…

Allow Users To Change Their Display Name
With the new “Can Change Display Name” permission granted to a user account, that user will be able to change their display name within your MIDAS system any time they wish.
Allow Users To Change Their Email Address
With the new “Can Change Email Address” permission, a user will be able to change the email address associated with their MIDAS user account. This is the address they use to sign in with and receive notifications at.
How a user updates their details
If a user has been granted at least one of the following permissions…
- Can Change Display Name
- Can Change Email Address
- Can Change Password
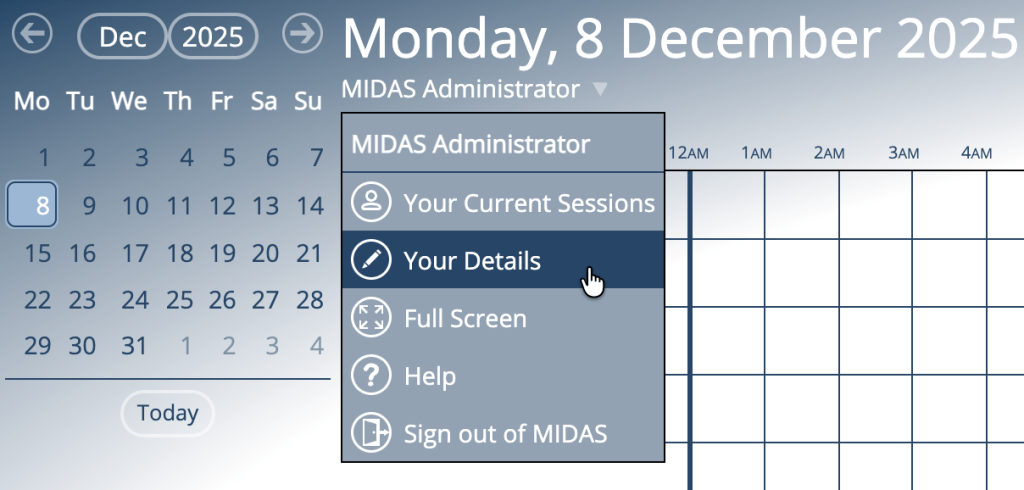
… then they can change their details at any time from the drop-down menu that’s displayed when they select their name (under the main date heading), and then select “Your Details”:
From the “Your Details” dialog, the user will be able to modify one or more of their details (depending upon permissions granted)

Administrators can also see when a user last updated their details from the Manage Users & Permissions screen:

For a complete list of all the booking software permissions that can be assigned on a per-user account basis in MIDAS, please see: https://mid.as/help/manage-users-and-permissions/list-of-available-user-permissions