In these unprecedented times, many organizations were forced to suspend their operations for the past several months. However, some are now beginning to take the first tentative steps towards reopening.
For most businesses who manage and hire out their facilities, this means making some fundamental adjustments to the way they operate.
So we wanted to share some tips on how to get the most out of your MIDAS booking system as your business navigates the road ahead…
1. Allow more staff to work from home
One of the benefits of cloud-based software like MIDAS, is that it can be accessed from anywhere with an internet connection.

This means that your administrative staff can log into your organization’s hosted MIDAS system remotely from home, just as if they were in their office at work.
“Remote Working” or “WFH” (Work From Home) is fast becoming the new norm. Many businesses are actively encouraging their staff to do so for at least the rest of 2020.
A cloud-hosted MIDAS system helps make this possible by allowing your staff to securely access your booking system from wherever they are.
If you currently run a self-hosted MIDAS system behind a proxy/firewall, please contact your IT admins. They should be able to arrange remote access to your MIDAS system.
2. Limit venue (room) capacities
Maintaining adequate social/physical distancing prevents arguably one of the biggest challenges when it comes to hiring out rooms and facilities.
When first setting up your “venues” (rooms/bookable spaces) in MIDAS, your administrator will have defined a maximum occupancy level (capacity) for each. This is the maximum number of people that each space can safely accommodate at any give time. These limits are enforced by MIDAS whenever new bookings are added and when a number of attendees are specified.
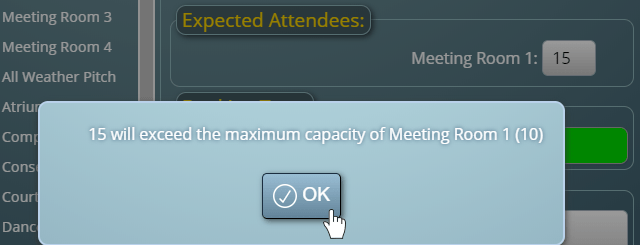
In this new age of social/physical distancing, it’s likely you’ll need to review the number of people allowed in each space at any one time.
MIDAS makes it easy really to adjust the maximum capacity of each of your venues. You’ll find this setting via MIDAS Admin Options → Manage Venues → [select venue(s)] → Capacity:

For more information, please refer to the help documentation.
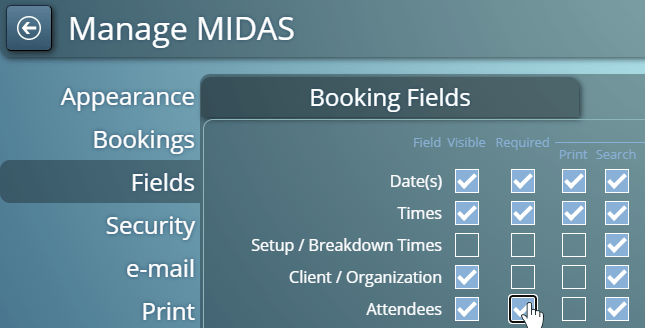
You may also wish to consider enforcing the entering of the number of attendees for every booking. By default, the “Attendees” field on the Add Bookings screen is optional (i.e. it can be left blank). To make this a required field, go to MIDAS Admin Options → Manage MIDAS → Fields → Booking Fields. On this screen, tick the “Required” box for the Attendees field:
For more information, please refer to the help documentation.
3. Limit overall site occupancy
In addition to being able to set maximum occupancy levels for each room/space, MIDAS also allows setting a “global” (site-wide) occupancy limit too.
MIDAS can warn you if the total number of people across all your facilities at any one time would exceed a threshold. It can also prevent further bookings if the total number of people on site exceeds a set threshold.

You’ll find these settings via MIDAS Admin Options → Manage MIDAS → Safety.
For more information, please refer to the help documentation.
4. Allow bookings (or booking requests) to be made online
Did you customers used to make bookings in person with your receptionist or office staff?
Did you know that MIDAS includes as standard both “Public Booking Request” and “Public Web Booking” features?
These public-facing features can help reduce face to face contact between your staff and customers.
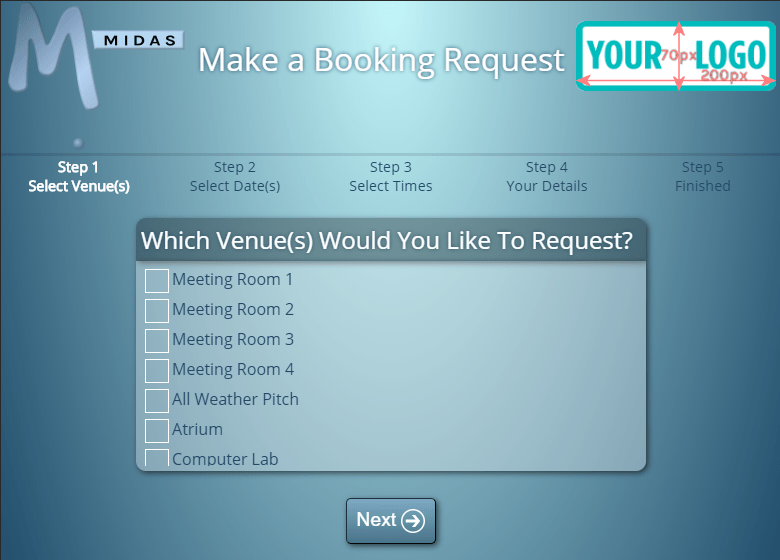
The Public Booking Request feature allows your customers to check availability of your rooms and submit booking “requests” online from the comfort of their own homes. Received booking requests can then be quickly approved/rejected by an administrator with just a few clicks.
For more information, please see our “How to make public web requests” video tutorial.
The Public Web Bookings feature is similar to the Public Booking Request feature, but allows your customers to make direct bookings online (rather than just booking “requests”). They can also pay for their bookings directly at time of booking.
For more information, please see our “How to make public web bookings” video tutorial.
The Public Booking/Request features may be enabled via MIDAS Admin Options → Manage MIDAS → Public.
5. Allow clients to pay their invoices online
If you use the extensive Invoicing capabilities of MIDAS, how do you clients normally pay you? If it’s by physical cash, did you know that MIDAS supports online invoice payments?
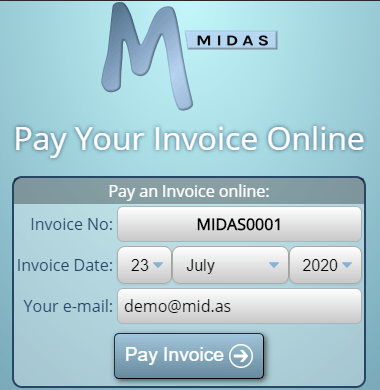
This feature may be enabled via MIDAS Admin Options → Manage MIDAS → Invoicing → Online Payments.
For more information, please see our “How to pay an invoice online” video tutorial, or the help documentation.
6. Keep your clients and users informed
MIDAS allows you to edit and customize a wide variety of “templates”.
These templates may be customized via MIDAS Admin Options → Manage MIDAS → Templates.
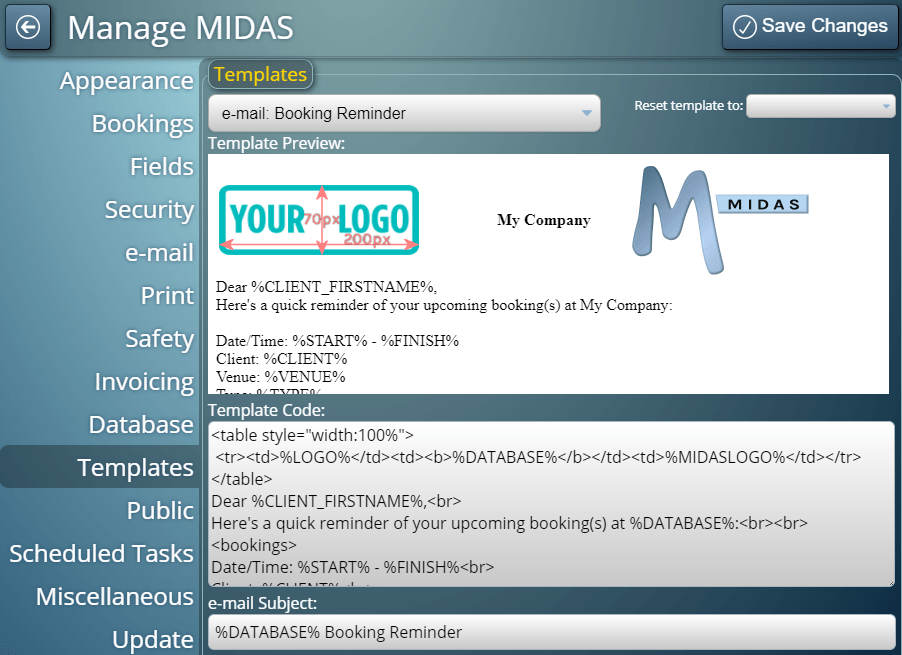
Here’s a few useful templates to highlight:
The “Welcome Note” template can be used to provide information or a custom message to users on their MIDAS login screens. This is a great way to let your staff know of any important changes.
The “Public: Web Requests” and “Public: Web Booking” templates can be used to provide information or updates to your customers on Public Booking/Request screens.
The “Email: Booking Reminder” template can be used to include important information for your customers in advance of their next visit. For instance, if they are required to wear a face covering/mask on your premises, you could let them know via email before their bookings take place.
You can enable and configure how far in advance Booking Reminder email notifications are sent to customers via MIDAS Admin Options → Manage MIDAS → Scheduled Tasks.
For more information on customizing templates in MIDAS, please see our “How to customize templates” video tutorial, or the help documentation.
We hope the above tips are useful in helping your organization to adapt and adjust going forward.
Remember, that if your business operations are still adversely affected by the current situation, we’re here to help!