How to configure MIDAS to send email via Outlook SMTP servers
Update & Test Your Email Settings
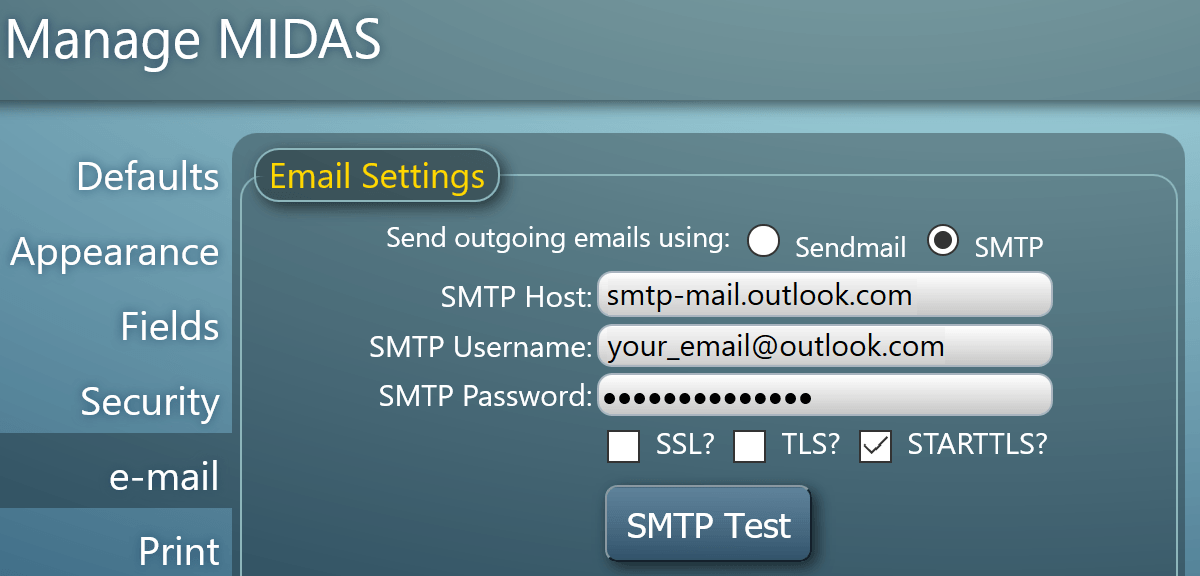
The email settings within MIDAS may be accessed via MIDAS Admin Options → Manage MIDAS → Email.In order to send mail from your MIDAS system via your Microsoft Outlook, Live, or Hotmail account, enter the following settings:

Replace "[email protected]" with your actual Outlook, Live, or Hotmail email address, and specify the corresponding mail account password. Also, ensure that the "STARTTLS?" option is selected.
Click "SMTP Test" to test the settings you've entered. If all goes well, you'll see a confirmation that a test email was successfully sent.
Troublshooting 535 5.0.0 Authentication Failed errors
Assuming the credentials you supplied were correct when performing an SMTP Test, if you see a "Error: 535 5.0.0 Authentication Failed" or similar error, this is most likely a result of Microsoft blocking external access to your email account from an unknown location or app. In this case, that unknown location or app will be the server where your MIDAS booking system resides.Along with this error, you may also receive an email or text from Microsoft informing you of "unusual sign-in activity".
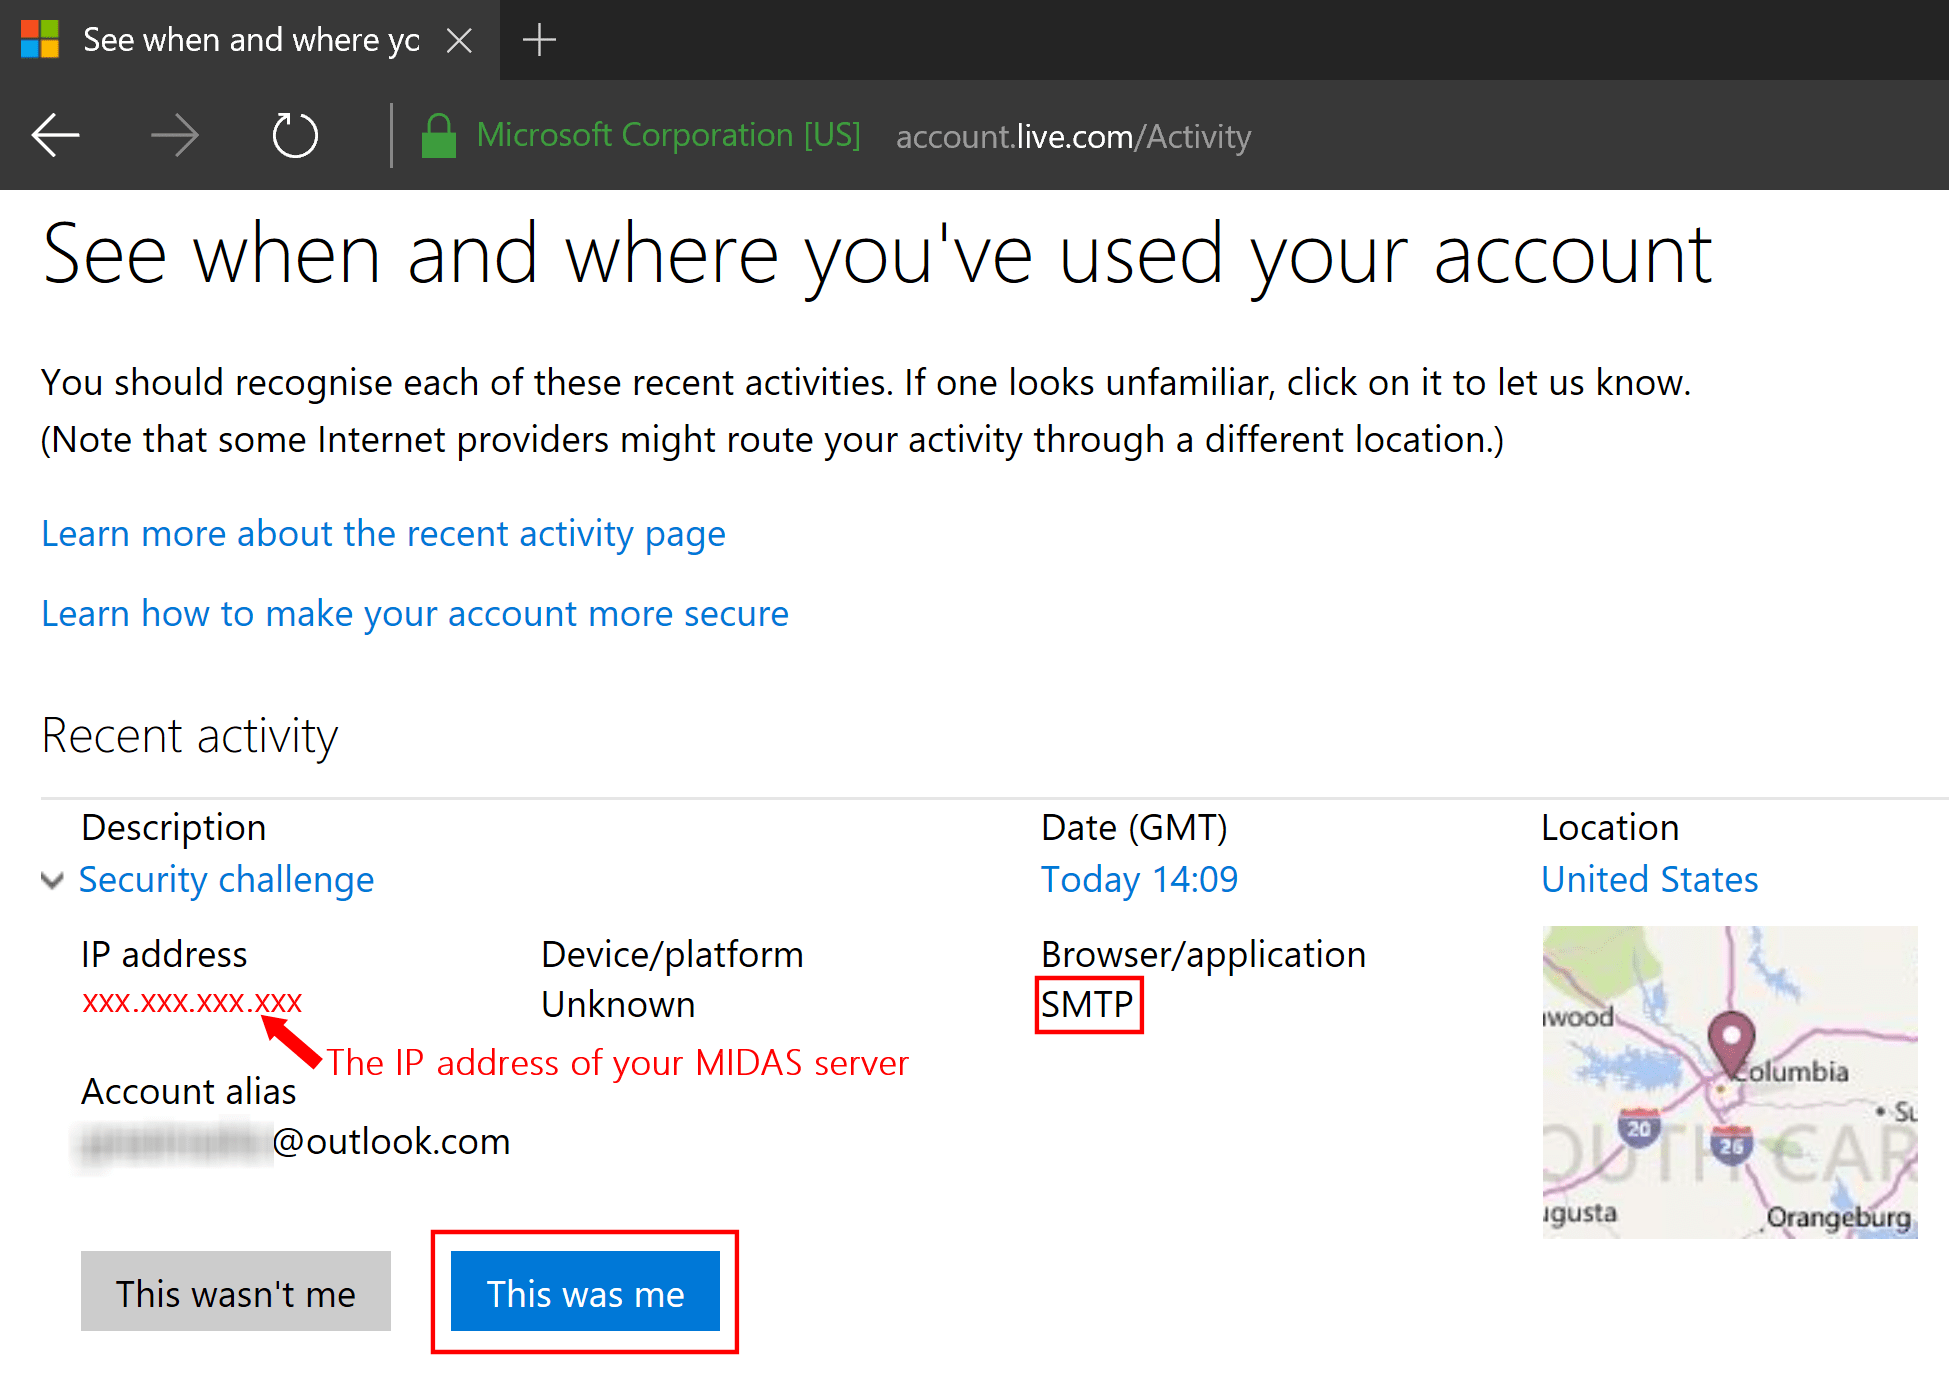
To resolve "Authentication Failed" errors when attempting to send email from MIDAS, simply point your browser to https://account.live.com/Activity.
This page will display recent login attempts to your Microsoft account. Those which it doesn't recognize (i.e. from devices/locations you've not logged into from before) will be flagged for your review.
Locate the entry with the IP address matching the IP address of the server where your MIDAS system resides and with the "Browser/application" listed as "SMTP", and click "This was me":

This will then grant future access to your MIDAS server to be able to send email via your Microsoft account.
Back in MIDAS, click the "SMTP Test" button once again. If all goes well, you should then see a confirmation that a test email was successfully sent.
Troubleshooting 535 5.7.3 Authentication Unsuccessful errors
Assuming the credentials you supplied were correct when performing an SMTP Test, if you see a "Error: 535 5.7.3 Authentication Unsuccessful" error, this is most likely a result of Microsoft no longer supporting account access via a traditional username and password combination as of 16th September 2024.Instead, you'll now need to create an "App Password". An "App Password" is used in MIDAS in place of your usual SMTP account password to allow you to send outgoing email via your Microsoft (Outlook) email account.
Here's how to setup an App Password for MIDAS:
- Go to the Security basics page and sign in to your Microsoft account.
- Select Advanced Security Options:

- Under "Additional Security" make sure the Two-step verification is on:

Note: App Passwords can only be used with accounts that have Two-Step Verification turned on in the Security Basics section of your Microsoft account.
- Once Two-step verification is on, you'll see the "App Passwords" section below it - click on "Create a new app password":

- On the next screen, you'll see the new app password:

- Copy the generated app password and click "Done". Back in MIDAS, paste the app password in place of your usual SMTP password, and save changes.
You should then be able to send email from MIDAS via your Microsoft Outlook email account.
← Return to the Knowledge Base


