How to fix "535 5.7.3 Authentication unsuccessful" email errors
If you've configured your MIDAS system to send email via Microsoft's Office 365 or Outlook SMTP servers you may encounter the following error when sending email:
Error: 535 5.7.3 Authentication unsuccessful
According to Microsoft, this error likely means that you've not enabled SMTP Authentication in your Office 365 account.
How to enable SMTP Authentication in Office 365
The per-mailbox setting to enable SMTP AUTH is available in the Microsoft 365 admin center.- Open your Microsoft 365 admin center and go to Users → Active users.
- Select the user, and in the flyout that appears, click Mail.
- In the Email apps section, click Manage email apps.
- Verify the Authenticated SMTP setting: unchecked = disabled, checked = enabled.
- When you're finished, click Save changes.
Once you've enabled SMTP Authentication for the mail account you've specified in your MIDAS system, you should then be able to send email from your MIDAS system without encountering a "535 5.7.3 Authentication unsuccessful" error.
If you're still encountering a "535 5.7.3 Authentication unsuccessful" error, then you may instead need to create an "App Password".
An "App Password" is used in MIDAS in place of your usual SMTP password to allow you to send outgoing email via your Microsoft email (Outlook, Office 365, etc) account.
Create an App Password
If you're send mail via an Outlook account, please refer to the App Password instructions in our "How to configure MIDAS to send email via Outlook SMTP servers" article.The following instructions relate to creating App Passwords for Office 365 accounts.
- Sign in to Office 365.
- Choose Settings → Office 365.
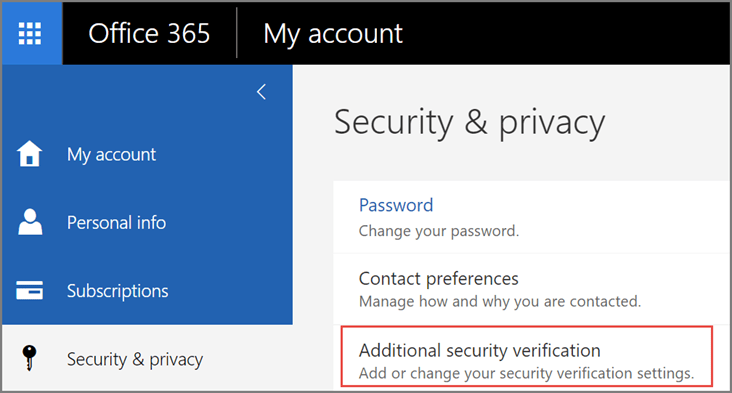
- Choose Security & Privacy → Additional Security Verification. You’ll only see this option if your admin has set up multi-factor authentication for your organization. If you don’t see this option, contact your Office 365 admin and tell them to turn on multi-factor authentication.

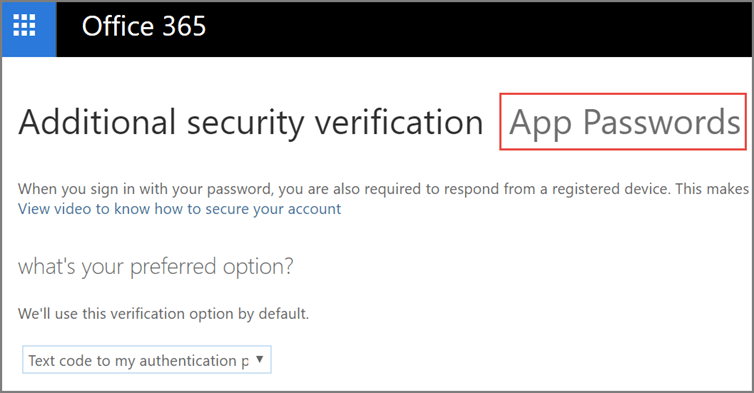
- Choose Update my Phone Numbers Used for Account Security. You should see the following screen:

- At the top of the page, choose App Passwords.
- Choose Create to get an app password.
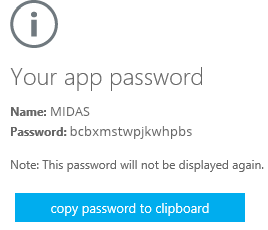
- If prompted, type a name for your app password (i.e. "MIDAS"), and click Next.
- Click the "copy password to clipboard" button. You won’t need to remember this password. Now open email settings in AutoMailMerge or AutoDocMail and use this password for SMTP connection parameters instead of your main account password.

- Back in MIDAS, paste the app password in place of your usual SMTP password, and save changes.
You should then be able to send email from MIDAS via your Microsoft email account.
← Return to the Knowledge Base


