Using the MIDAS API with Postman

The following article outlines how to use the MIDAS API with Postman.
This article is provided as a guide only, and assumes that you already have an active account on the Postman platform. For further assistance setting up or using Postman, please refer to the vendor's own documentation/support.
Contents:
- Step 1 - Import the MIDAS API Collection
- Step 2 - Configure Authorization
- Step 3 - Configure your API URL
- Step 4 - Make API calls
Step 1 - Import the MIDAS API Collection
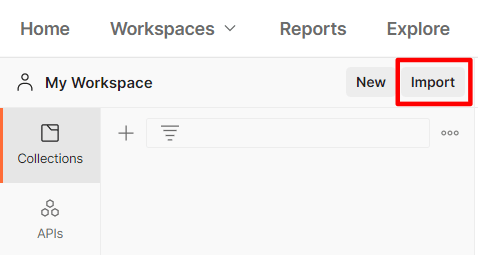
Once logged into the Postman platform, navigate to or create a new Workspace. For this example, we've created a new Workspace named "My Workspace".It's now time to import the MIDAS API collection. To do this, click the "Import" button.

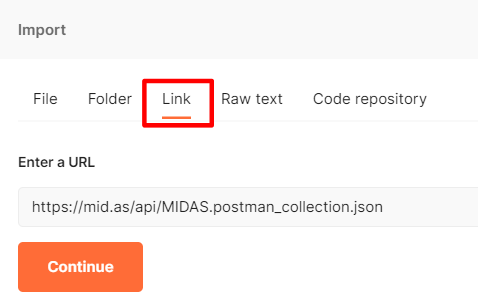
In the resulting Import dialog, select the "Link" import option, and enter the following URL:
https://mid.as/api/MIDAS.postman_collection.json

Then click "Continue".
On the following dialog, click "Import":

The MIDAS API collection will then be imported into your Postman workspace.
Step 2 - Configure Authorization
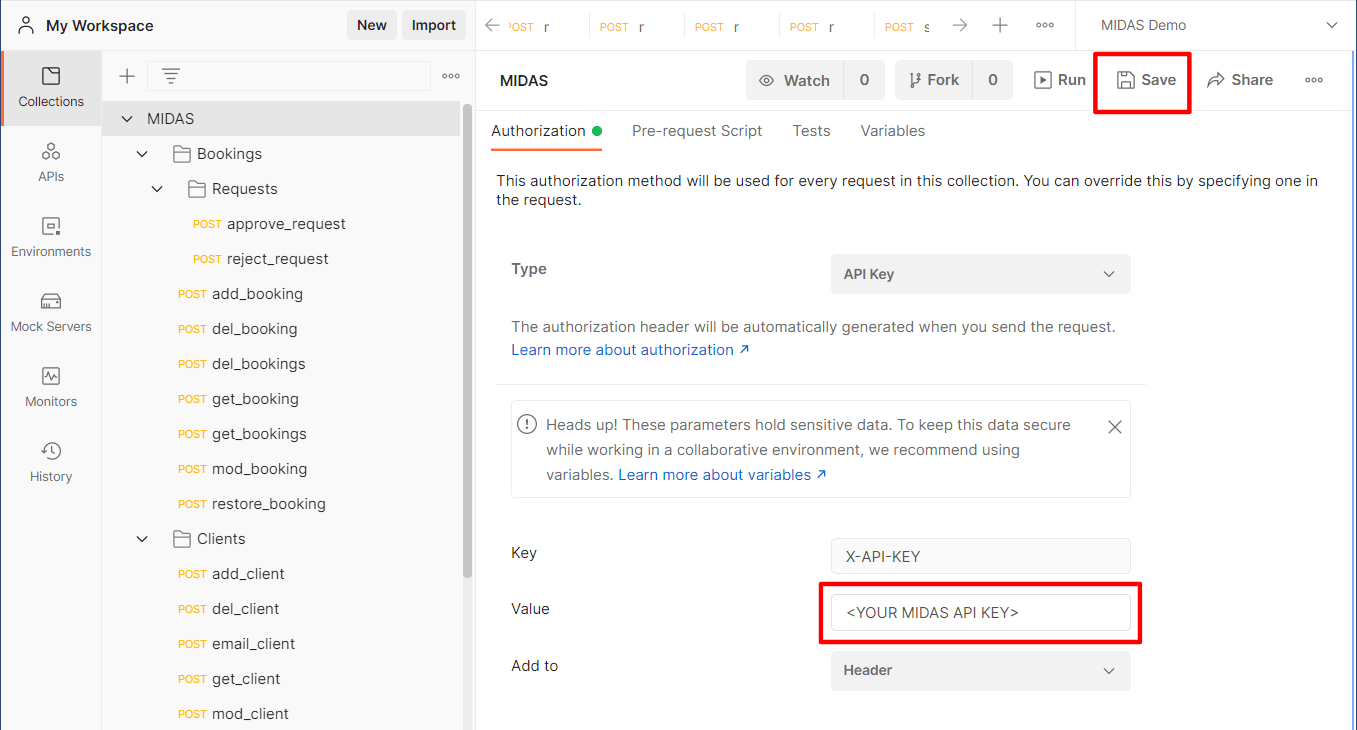
Select the "MIDAS" collection in your Postman workspace, and then click on the "Authorization" tab:
Ensure the "Type" field is set to "API Key", and the "Key" field to "X-API-KEY".
Enter your MIDAS API key in the "Value" field, then click the "Save" button near the top.
Step 3 - Configure your API URL
Switch to the "Variables" tab, and create a new variable named "URL" (uppercase, no quotes). Set both its initial and current value to the URL of your MIDAS system. The URL should not include any filename.
Finally, click the "Save" button.
Step 4 - Make API calls
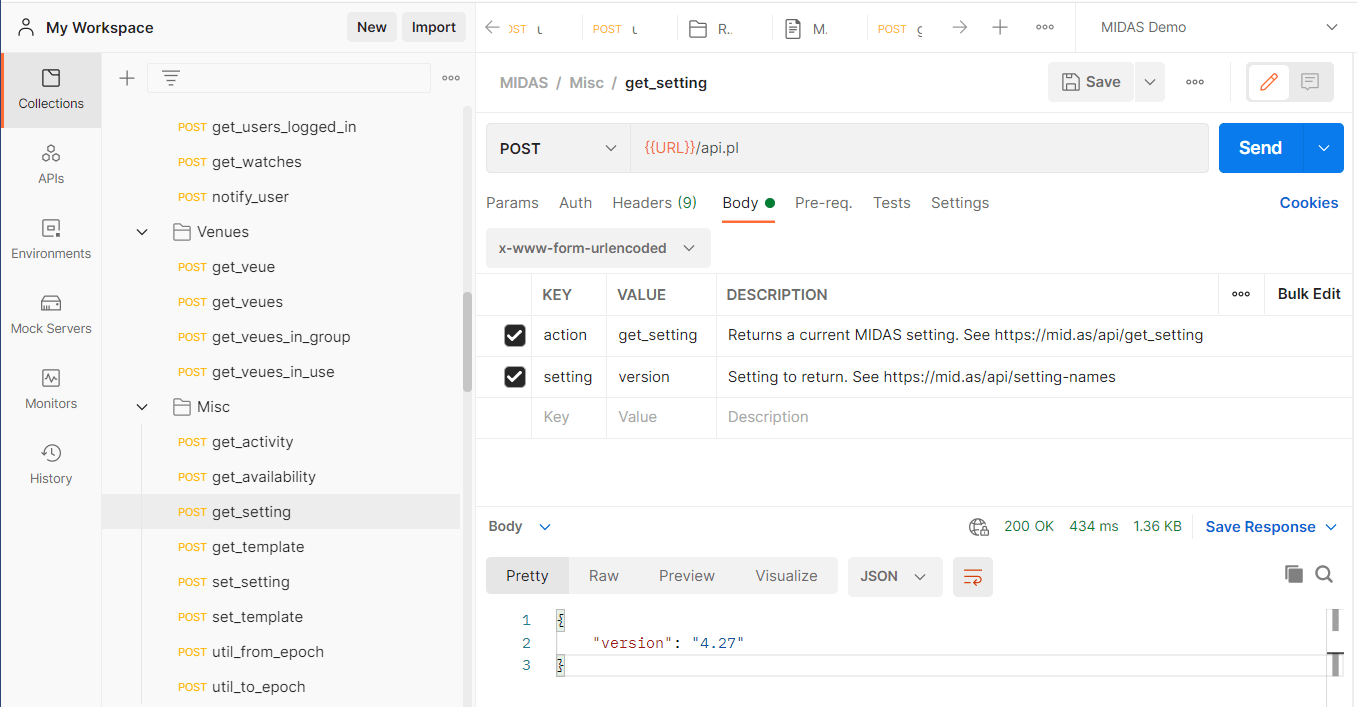
You're now ready to make calls to the MIDAS API from within Postman.Here's an example of using the MIDAS API to retrieve the version number of your MIDAS system via Postman:

- In the MIDAS API collection, navigate to the "get_setting" entry (you'll find this in the "Misc" folder)
- In the "VALUE" column for the "setting" row in the right-hand pane, enter "version".
- Click the "Send" button.
- Postman will then make a call to your MIDAS API to retrieve the version number of your MIDAS system, and display the results, for instance: {"version":"4.30").
← Return to the Knowledge Base