How to import client data from another application into MIDAS
Prerequisites
Using the import tool, you can import client data into MIDAS v4.06 or later, that is either in a .csv (Comma Separated Values), or .txt (Tab, or other character, Delimited) file format.Preparing your data for import
If there is an "Export" feature in your existing 3rd party software application, use it to export your client or contact data. Ideally this data should be exported as either a Comma Separated Value .csv file, or a delimited .txt file.If your software doesn't allow you to export in one of these formats, you will need to further convert your exported data before you can import it into MIDAS. For example, if your application will only allow you to export in an Excel spreadsheet format (either as an .xls or .xlsx file), you will then have to open your file in Excel and re-save it again as a .csv or .txt file.
Alternatively, if you wish to create your own data for import into MIDAS, you can do this in a spreadsheet application, such as Excel or Google Sheets, and save your data as a .csv or .txt file. If creating your own spreadsheet in this way, be sure to include each field (such as name, organization, phone number, etc) as separate columns within the spreadsheet, and then each individual client record as a new row.
Exporting contacts from Microsoft Outlook
| Exporting contacts from Mozilla Thunderbird
|
Once you have your exported or manually created data prepared, you are ready to use the import tool to import the data into MIDAS.
You can import client data via MIDAS Admin Options → Import → Clients.
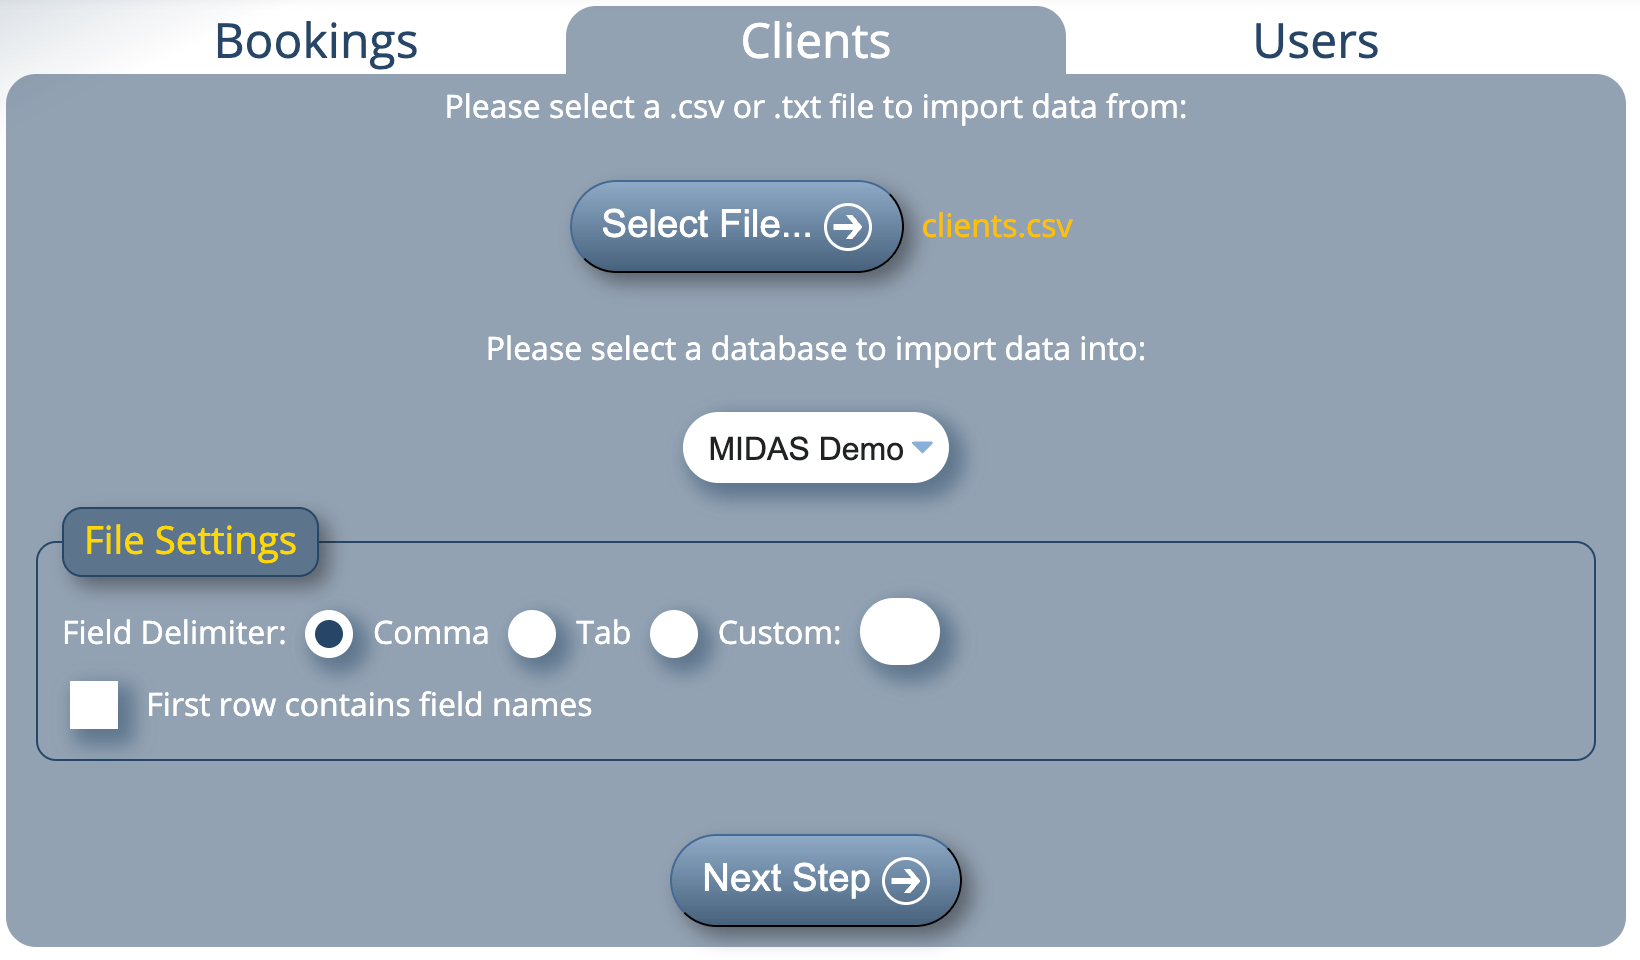
Step 1 - Select file to import

- Use the "Select File..." button to locate your .csv or .txt client data file to import.
- If running multiple databases in your MIDAS booking system, select the database you wish to import data into.
- If each field in your data file is "Comma Separated", select the "Comma" delimiter option.
- If each field is separated by a "Tab", select the "Tab" delimiter option.
- If each field in your data file is separated by a different character (i.e. the "|" (or "pipe") character), select the "Custom" option, and enter the delimiter character.
- If the first record (or "row") in your data file contains field names - rather than actual client data - select the "First row contains field names" option to prevent this data being imported into MIDAS.
- Click the "Next Step" button.
Step 2 - Specify import options
The next screen will show you a "snapshot" of the data you are about to import in a table:
- At the top of each column in the table is a drop-down list allowing you to "assign" each column to a specific client field within MIDAS.
- For example, if the first column of your data file contains client names, select "Client" at the top of this column.
- Do this for all columns you wish to import.
- If your data file contains a column, or columns, that you don't wish to import data from, select the <Don't Import> option from the drop-down at the top of these columns.
Step 3 - Import
Upon completion on the import (which may take several seconds depending upon the amount of data being imported), you should see the following confirmation. This will indicating how many new records have been imported:
← Return to the Knowledge Base