
How to install & configure MySQL on Windows
It applies to self-hosted installations of MIDAS booking software on Windows-based servers only.
MIDAS requires either MySQL or MariaDB to be installed. This article outlines how to install MySQL on Windows. Instructions for installing MariaDB may be found here instead.
This article assumes that you've already successfully completed our previous "How to install & configure Apache on a Windows server" guide.
Contents:
Step 1 - Download MySQL for Windows
MySQL for Windows may be downloaded from MySQL.com.A free "MySQL Community Server" edition is available in both a "web" installer and a "standalone" installer:
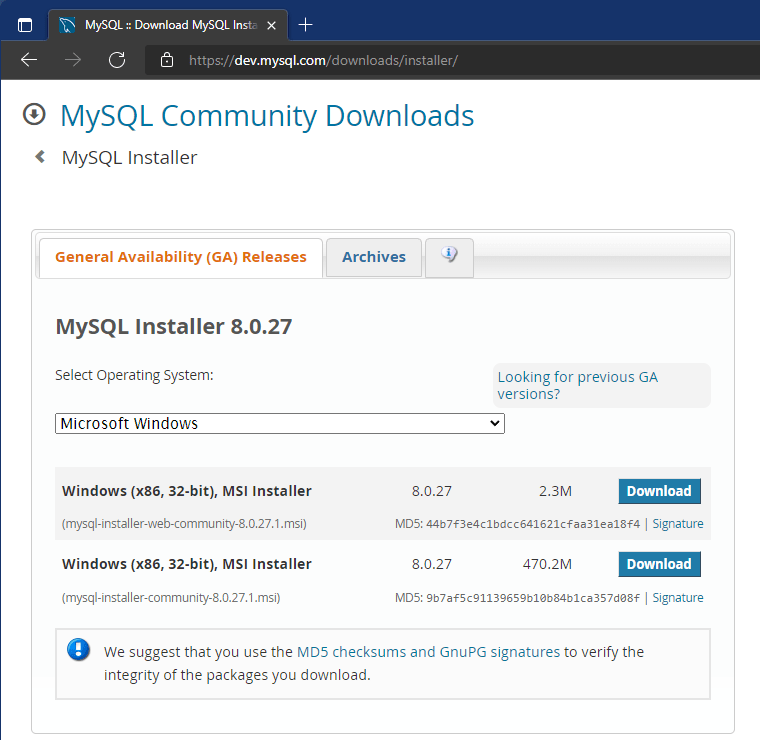
Choose either the "web" installer (which has smaller initial installer download size, but with additional components downloaded during install), or the "full" installer (which has a larger installer download size, but doesn't require downloading any additional components during install) and click "Download".
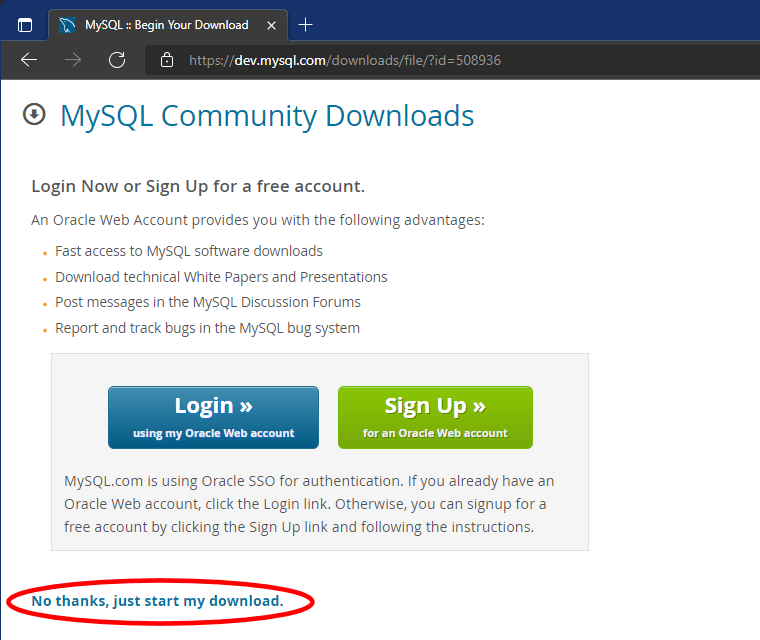
You'll then be offered the option to sign up for - or log in to - an Oracle Web account, but you can skip this step by clicking the "No thanks just start my download" link:
Step 2 - Install MySQL
Run the MySQL Installer, read & accept the License Agreement, and choose a setup type: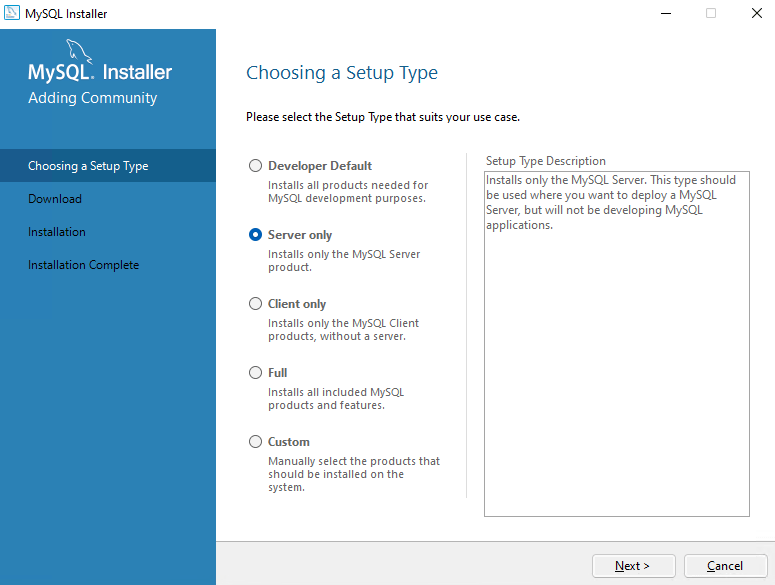
As a minimum, you'll need to install the MySQL server, so we'd suggest selecting the "Server only" option.
The installer will then download (in the case of the "web" installer) and then install the selected components:
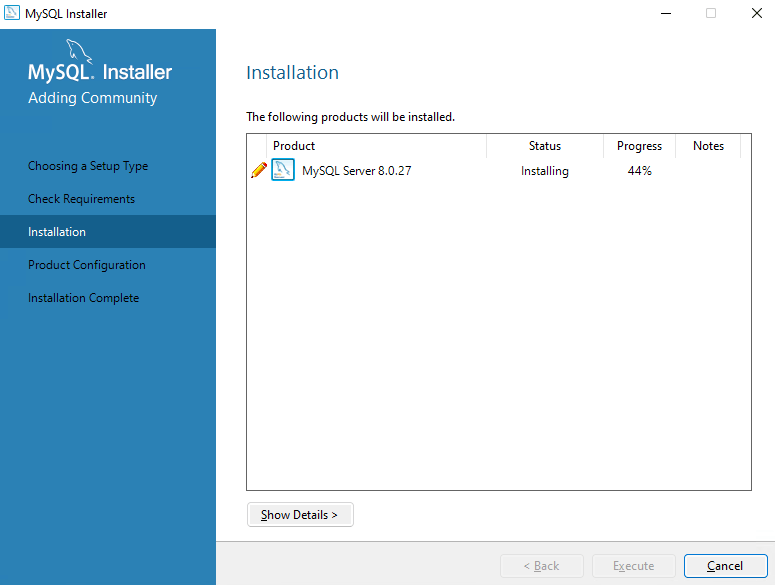
Once installation is complete, click "Next" to configure your MySQL server:
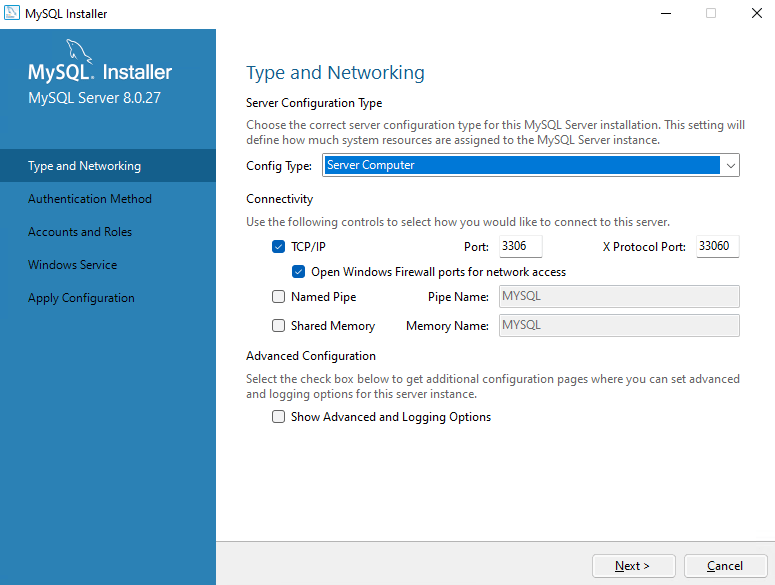
Select the "Config Type" most applicable to your server. This should either be "Server Computer" in the case that you're installing MySQL on a server where other applications are installed/running, or "Dedicated Computer" in the case that the server you're installing MySQL on is to be dedicated to MySQL only and won't be running any other applications/services.
You can also specify "Connectivity" options on this screen. In most cases, you can leave these as the default (TCP/IP, Port 3306).
Click "Next" and you'll then be prompted to select an authentication method:
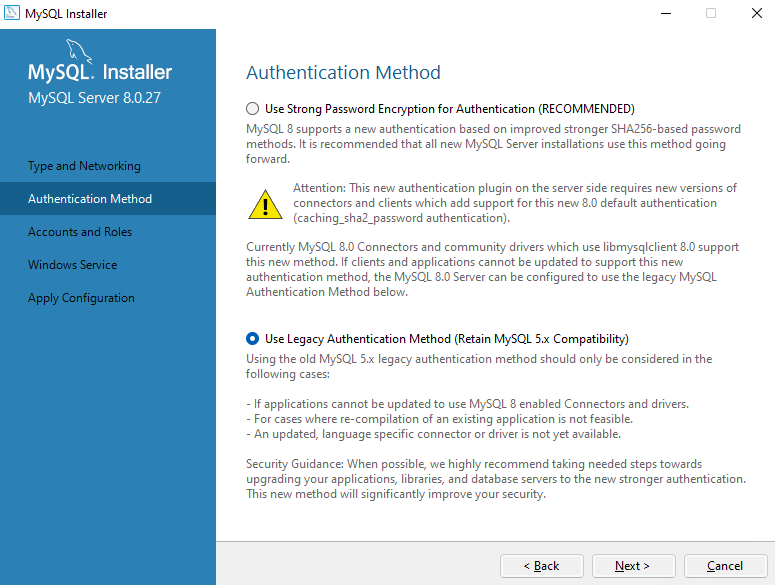
The particular software environment and applications which will be using your MySQL server will determine which authentication method you select here. If in doubt, or for maximum compatibility, we advise selecting the "Use Legacy Authentication Method (Retain MySQL 5.x Compatibility)" option.
Click "Next" and you'll then be prompted to set up a MySQL root password:
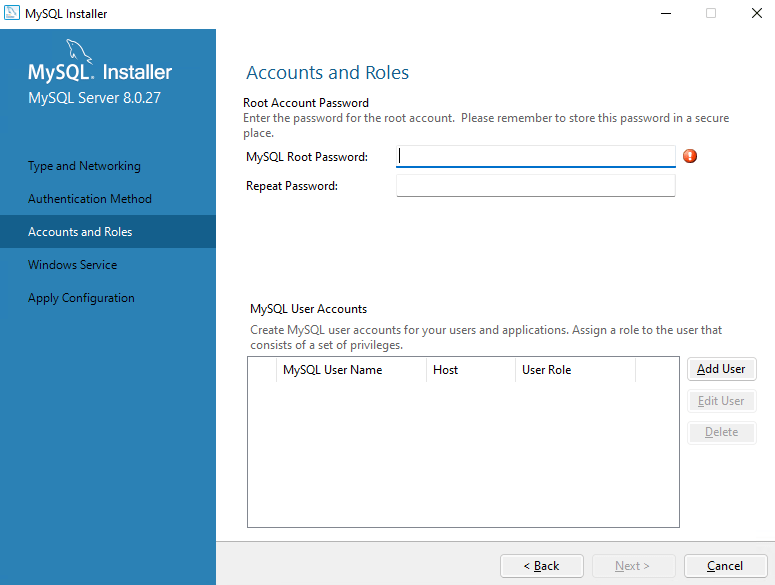
This should be a secure password as it will be used to protect your MySQL server from unauthorized changes/access. You can also set up additional MySQL user accounts from this screen. If your MySQL server is to be used for multiple applications as well as MIDAS, it's strongly advisable to set up dedicated MySQL user accounts for each service which will be utilizing your MySQL server.
Click "Next" and you'll then be presented with options to configure MySQL to run as a Windows Service, so that it automatically runs whenever Windows starts:
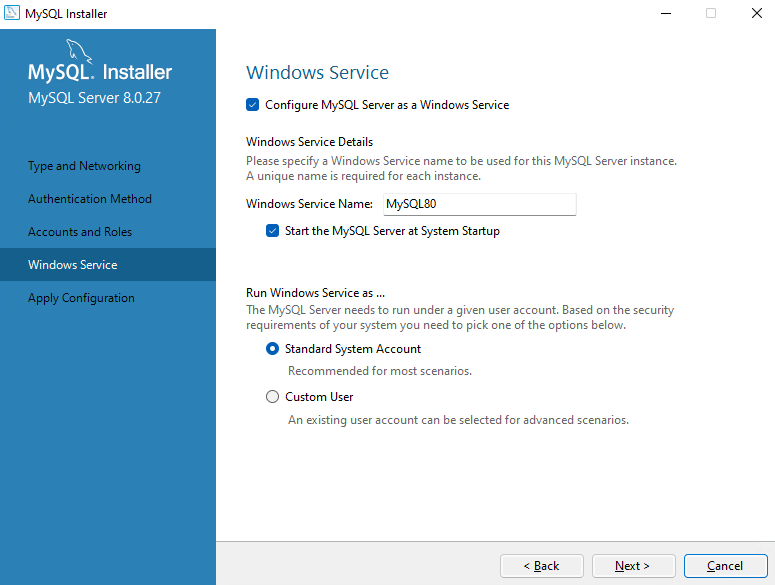
Ensure the "Configure MySQL Server as a Windows Service" and "Start the MySQL Server at System Startup" options are selected and that the Windows Service is set to run as a "Standard System Account"
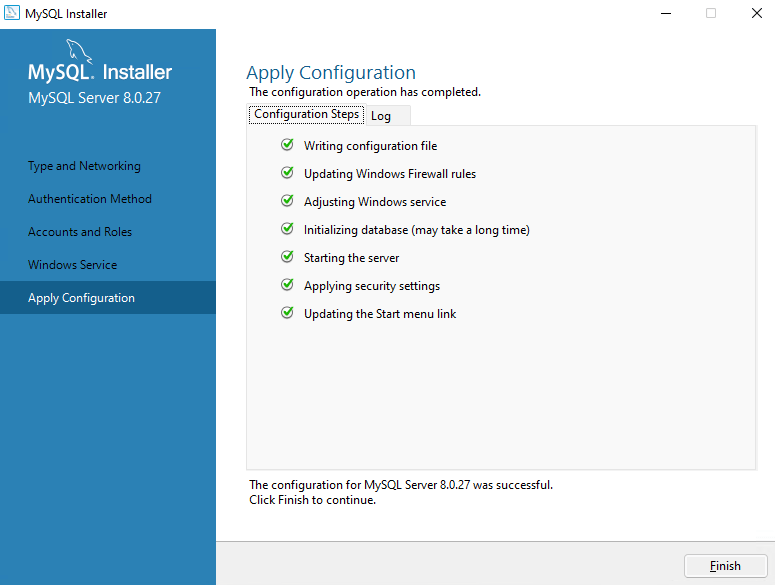
Clicking "Next" will then configure and start your MySQL server:
Also In This Series...
Part 1: How to install & configure Apache on a Windows server
← Return to the Knowledge Base